


-
Por categoría de producto
-
Buscar por producto
-
Buscar por tipo de pregunta
This article mainly introduces two cases to configure the adapter to access the Internet and register to the SIP server. Case 1 for the situation that using a wired connection to get internet, case 2 for the situation that using a wireless connection to get internet.
Case 1 Using the Ethernet cable to get internet
Step 1. Physical connection
|
|
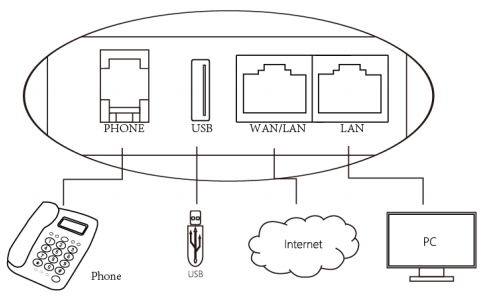
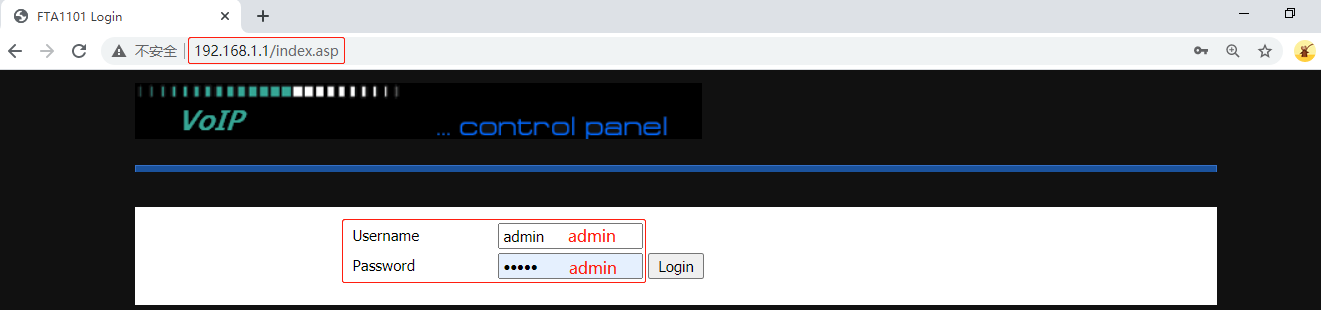
Step 2. Login to the adapter’s management page
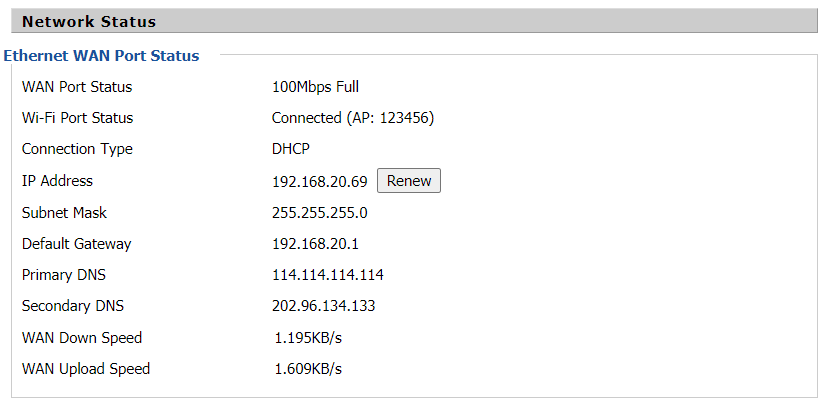
Step 3. Check Network Status
The adapter will get the WAN IP address automatically, which means the internet is working without any settings. Check the network status under Status > Basic > Network Status.
Step 4. Register to the PBX server
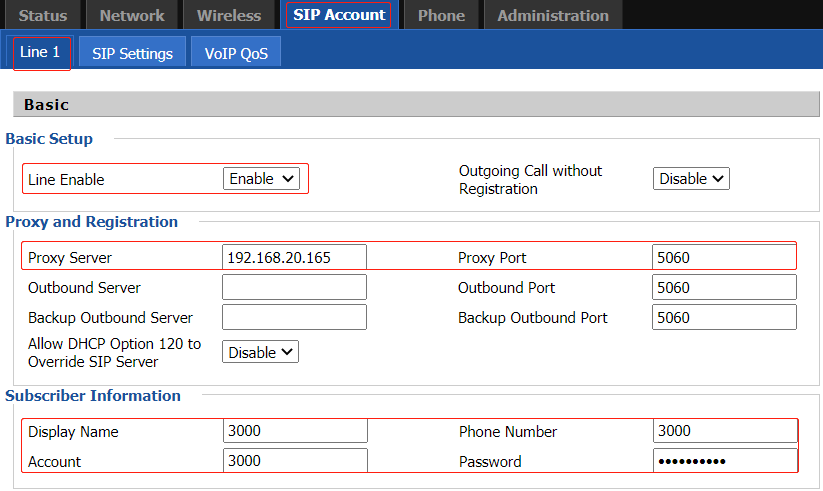
Connect the analog phone to the adapter’s Phone port, go to SIP Account > Line 1, enable the option Line Enable, enter the Proxy Server, Proxy Port, Display Name, Phone Number, Account and Password, then click on Save&Apply on the bottom of the page.

|
|
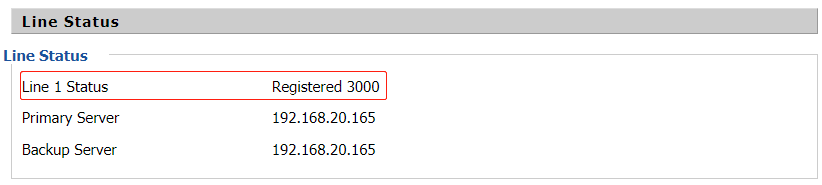
When registering to the PBX server successfully, the adapter’s LED indicator will change to solid green, and the SIP Account Status shows Registered. The analog phone can make outgoing calls or receive incoming calls
 .
.
Case 2 Using the Wireless connection to get internet
Step 1. Physical connection
Connect FTA1101’s LAN port to a computer with an Ethernet cable, connect the Phone port to an analog Phone, When connected properly, the adapter’s light will be solid red, the computer will get an IP address(192.168.1.X) from the adapter.

Step 2. Login to the adapter’s management page
Open a browser and type in the adapter’s LAN IP address 192.168.1.1 in the address bar, a login page displays as below, both the default username and password are admin. Then click Login.

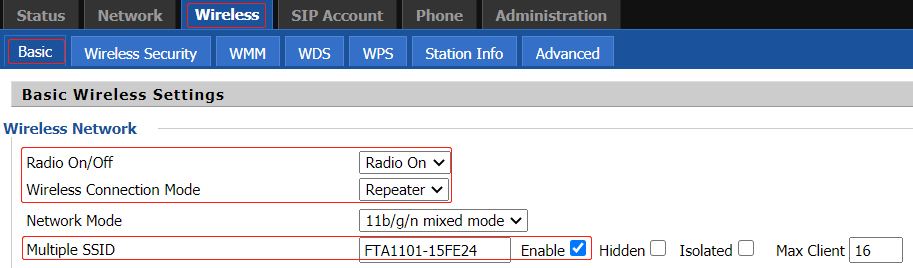
Step 3. Configure the adapter’s Wireless Connection Mode
To ensure the adapter gets internet access, we need to change the adapter’s wireless connection mode to repeater. Go to Wireless > Basic, enable the Radio, change the Wireless Connection Mode to Repeater, set up an SSID(wireless network name). Click on Save at the bottom of the page.
|
|
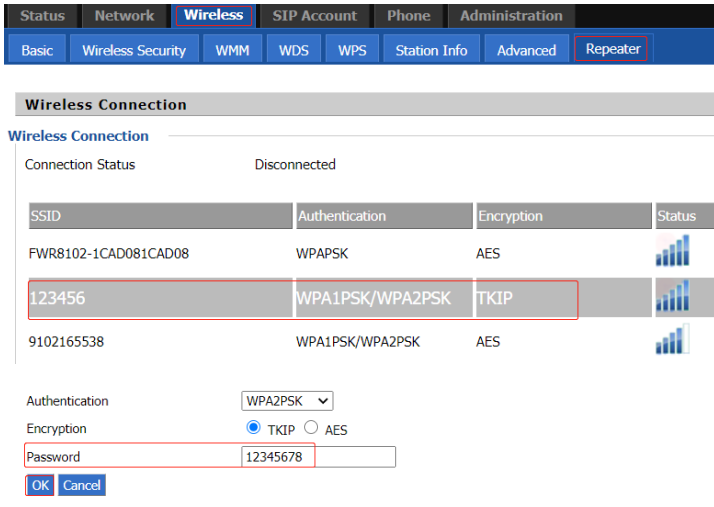
Go to Wireless > Repeater, the wireless connection status is Disconnected. Select the Wireless Network that you want to connect, click on Connect, enter the password and click OK
 .
.
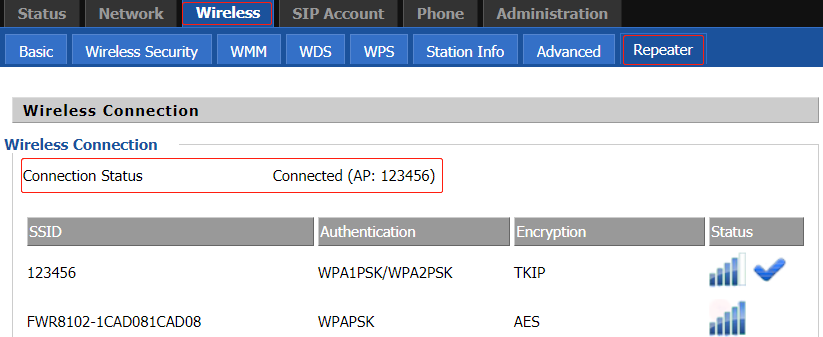
When the adapter connects to the WiFi successfully, the wireless connection status will change to Connected. And display the SSID that you are connected to.
Step 4. Register to the PBX server
Connect the analog phone to the adapter’s Phone port, go to SIP Account > Line 1, enable the option Line Enable, enter the Proxy Server, Proxy Port, Display Name, Phone Number, Account and Password, then click on Save&Apply on the bottom of the page.
When registering to the PBX server successfully, the adapter’s LED indicator will change to solid green, and the SIP Account Status shows Registered. The analog phone can make outgoing calls or receive incoming calls.
 Back to list


