


-
Por categoría de producto
-
Buscar por producto
-
Buscar por tipo de pregunta
Quick Start for IP Phone Series
Dec 11, 2020
User may not know how to install, configure the IP phone the first time he/she gets it. The following describe briefly how to install and perform IP phone, go and have a look.
(1) Check the package
Usually, there is one IP phone unit, one handset and handset cord, one Ethernet cable and one universal power adapter in the package, some IP phone may provide one base stand and some screws used for wall-mount. You'd better check the package when you get the device, if anything missed, contact the manufacture or the phone provider.
(2) Assemble the phone
① Plug one end of the coiled phone cord into the left side of the phone base.
② Plug the other end of the handset cord into the jack at the bottom of the handset.
③ If you are using an external power source, push the power cord into hte power supply, and plug the power supply into the phone base unit.
Notice: Use only the power supply that came with the phone.
If you need mount the phone to the wall, you still need:
④ Attach two appropriate screws to the wall. Leave 1/4 distance from the wall. This allows you to slide the mounting brackets on to the screws. Push down slightly to lock the phone in place.
(3) Turn on the phone
① Plug the AC power adapter into the electrical outlet.
② The LCD will firstly display "Welcome, initializing......" and all of the lights on the phone will flash.
③ Then , the LCD will display "Initializing Network“.
④ After the sequence, the phone will display the date&time on the LCD and line status for the phone, some phone may display the Internet port IP address( if phone can connect to the Internet) on the LCD, too. This means phone started normally.
Notice: If the phone does not provie this screen, re-confirm installation and connects. If these are incorrect, try unplugging the phone and plugging it back in again. If you still don't see the display, then contact your phone administrator or service provider.
Notice: Flying Voice IP601, which has no LCD, user are unable to see the upon phenomenons, when user plug the AC power adapter into the electrical outlet, the LCD on phone's back will flash, wait for about 40-60 seconds, pick up the handset, you will hear "Please enter your option, 1 WAN port connection type...", this means the phone start normally.
(4) Registration
User need connect the IP phone to the Internet before register.
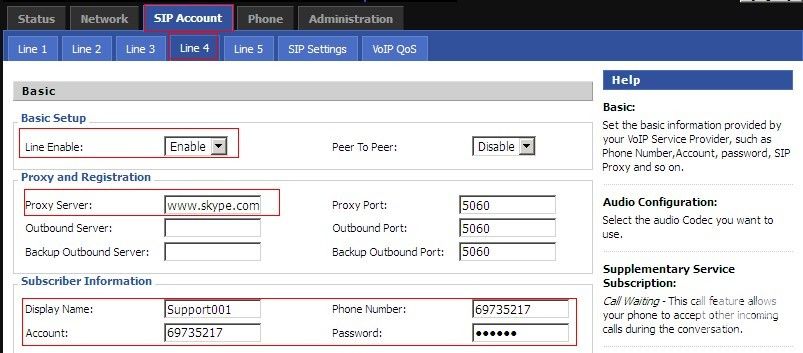
① Login the Web of IP phone and go to SIP Account-->Line page.
② Enable the line and fill in the IP address of your SIP server;
③ Fill in the SIP account and the corresponding parameters.
④ Save the changes and reboot the phone.
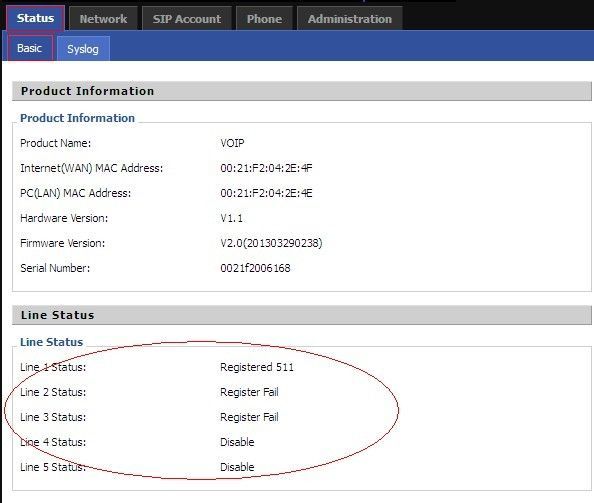
After phone reboots, user can check the line status to see if it registers successfully, green indicates register successfully and red indicates not. Or user can login the web to check on the status page.
(5) Make a call
After register successfully, user can make calls use the IP phone. Pick up the handset and press the numbers, end with #, number will be sent immediately.
(6) Receive a call
When there is an incoming call, phone will ring and the corresponding line led will flash. Pick up the handset or press the SPEAKER button, then user can talk to the caller.
 Back to list


